Let’s say you run a consulting business. You scout out customers in need of car insurance, health insurance, etc. Or maybe you’re using HubSpot to keep your customers’ accounts organized by the agencies they belong to.
But you’ve hit a snag:
You have to manually associate the Accounts to the Agencies in HubSpot.
I may not be a business owner, but you’ve probably got quite a few of each. Doing the job manually would take forever. And that’s not counting any new records that get created either.
So how do we fix this problem? With Associ8! It’s a HubSpot app that can automate associations for you. Let’s take a look at how it can help with this use case.
How to automatically associate Accounts to Agencies in HubSpot
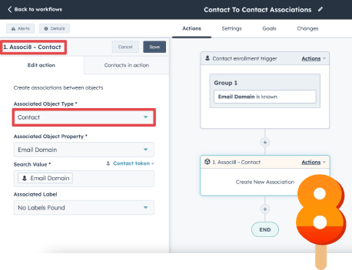
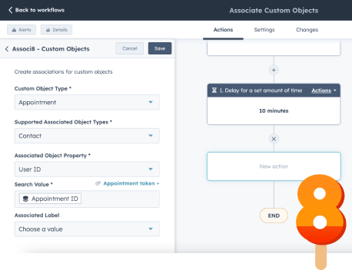
Since Accounts and Agencies are custom objects, we’ll need to use the Associ8 - Custom Objects action in a custom object based workflow. That feature comes standard with the app’s Pro tier.
We’ll need some properties on both objects that could potentially have the same value. Fortunately, the Account object’s Account ID and the Agency object’s Agency ID can do the job for us (More info on that later)!
1. Start by creating an Account based workflow.
2. Set the enrollment trigger to Account ID is known.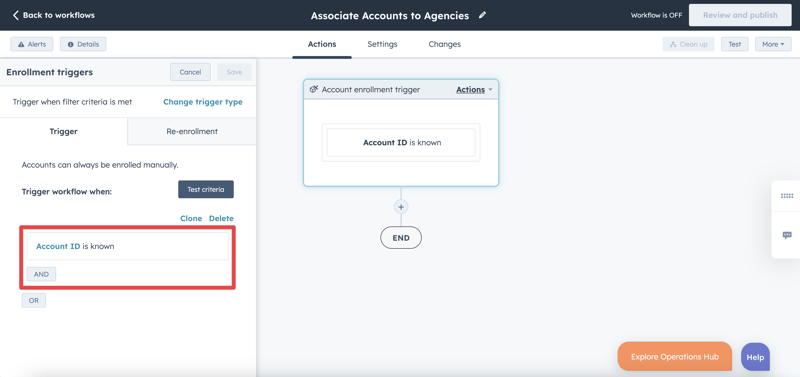
3. Click the + button beneath the workflow trigger and add the Associ8 - Custom Objects action. Keep in mind, this action will only work in a custom object based workflow.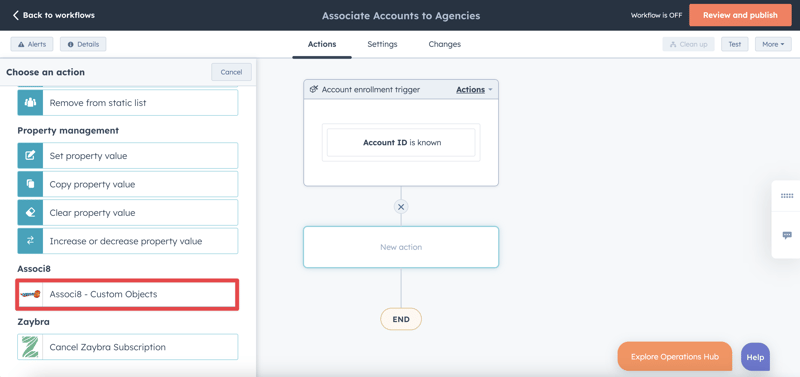
4. For Custom Object Type select Account.
5. For Supported Associated Object Types select Agencies.
6. For Associated Object Property select Agency ID.
7. For the Search Value add the Account ID token.
8. Click Save and you’re all done!
If you’re new to Associ8, you may be a little confused at what we just did here. Essentially, whenever an Account object has a value entered into its Account ID property, that Account will enter this workflow.
Associ8 will then take a look at all of your Agency objects. If any of them have an Agency ID that matches the account’s Account ID, the account will be associated to them. If you need more info on what the various fields mean or how the app makes associations, check out this blog post.
And that’s all there is to it! If you enjoyed this post, why not share it with your friends? And if you want to see what else the app can do, check out this blog post on How to Bulk Unassociate Objects Using Associ8!