So you’re helping customers manage their tickets using hapily’s Customer Service Portal. They will love you for making their lives easier!
But when you go to make customizations on your end, what will you see? How will it affect what your customers see when they log in? It’s important to know these things before making any changes.
Don’t worry though! I’ll give you an overview of what you’ll see when managing your new customer portal and what your customers will see on their end.
What’s on the user (your) side of the Customer Service Portal?
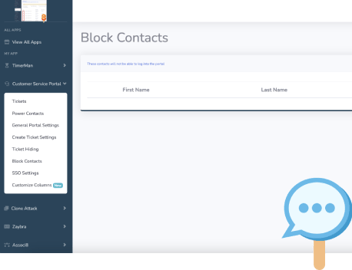
If you’ve used hapily apps before, you’re likely already familiar with the hapily admin portal. This is where you’ll manage all of your installed hapily apps, including the Customer Service Portal.
If you’re new to the hapily admin portal, check out this blog post for a run down of how to use it. Otherwise, log into it here and click Customer Service Portal in the left sidebar to view your management options.
From here you can reply to tickets submitted to your portal, set up power contacts, block contacts, customize your portal, and more! If you need more info on what each of these options do, be sure to check out our knowledge base.
What’s on the customer side of the Customer Service Portal?
Without knowing exactly what your customers are seeing, it can be a little unnerving to make any customizations. That’s why I’ve got some insider info for you!
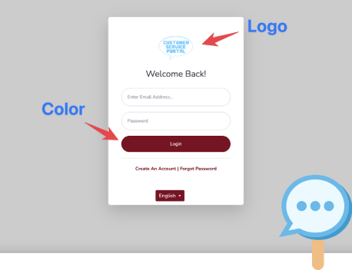
When a customer is invited to your portal, he’ll be taken to this log in screen:
You may notice it looks similar to the hapily login page. That’s normal! You can use the General Portal Settings page to add your own branding to it later.
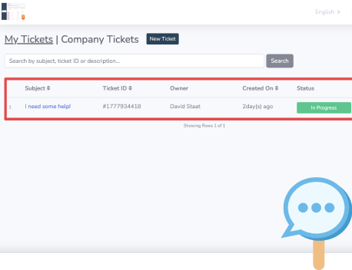
Once your customer creates an account and logs in, he’ll be taken to his ticket page! A list of all the tickets he’s submitted will be viewable from the My Tickets tab. If you have him set as a power contact, he’ll be able to view any tickets submitted by his company in the Company Tickets tab.
I used some of the Customer Service Portal’s customization features to add a few buttons. For example, I added a button for creating new tickets and one for easy access to my knowledge base.
And that’s the general rundown! Now that you know how things look for both you and the customer, you can start customizing.
If you liked this post, be sure to share it with your friends. And if you want to see what else the app can do, check out this blog post on How to Customize Ticket Columns in the Customer Service Portal!