If you’re reading this, odds are you’ve decided to start using hapily apps to upgrade your HubSpot experience. Since you’re going to be hanging around, you’ll need a crash course on how the hapily admin portal works.
Don’t worry though. You’ve got me here to walk you through it.
What is the hapily Admin portal?
It’s where all your HubSpot dreams can come true! From here, you can manage your app settings, track which apps you have installed to which HubSpot portals, and even add new admins to help you keep things running smoothly.
When you install a hapily app for the first time, you’ll automatically be prompted to create a hapily portal. So don’t sweat that part! If you want to check yours out, you can log in here.
How to change your hapily portal password
This one’s EASY. Just click your name in the upper right corner of the screen and click Profile. You can enter in your new password from there!
How to manage your installed apps in the hapily portal
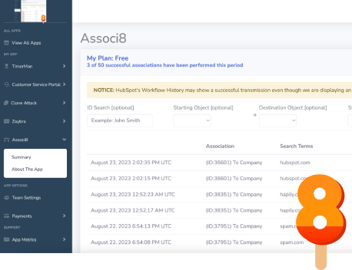
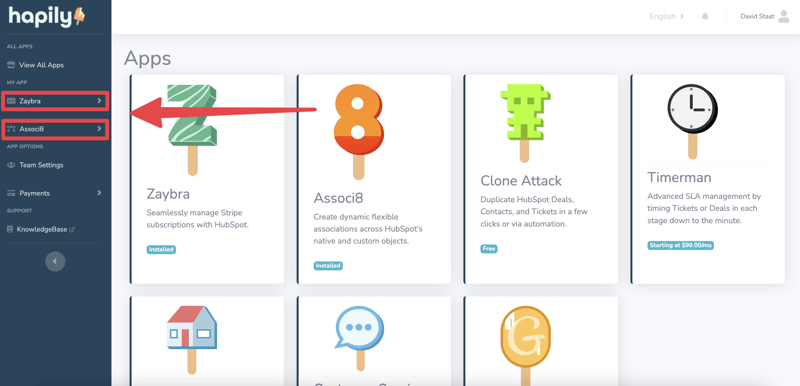
You’ll always be greeted to a list of all hapily apps when you log into the portal. But to view the ones you have installed, you can take a look at the left sidebar.
You can click on the app’s name to reveal dropdown lists. These will allow you to change app settings, keep track of app usage, and much much more! Keep in mind, the options you’re given will vary depending on the app.
How to change HubSpot IDs in your hapily portal
“Wait what?” I hear you asking. If you have multiple HubSpot portals with hapily apps installed, you may log on one day to see that the apps you installed aren’t in the left sidebar. Oh no!
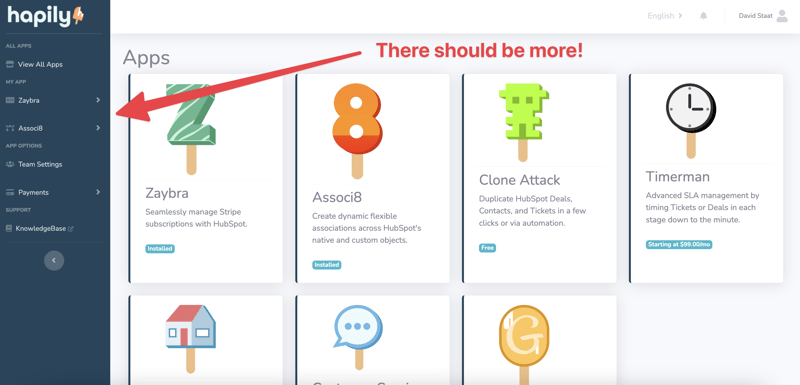
Don’t panic. You’re just just viewing the apps for the wrong HubSpot portal. To ensure you’re viewing the correct one, click your name in the upper right corner of the portal and select from the dropdown.
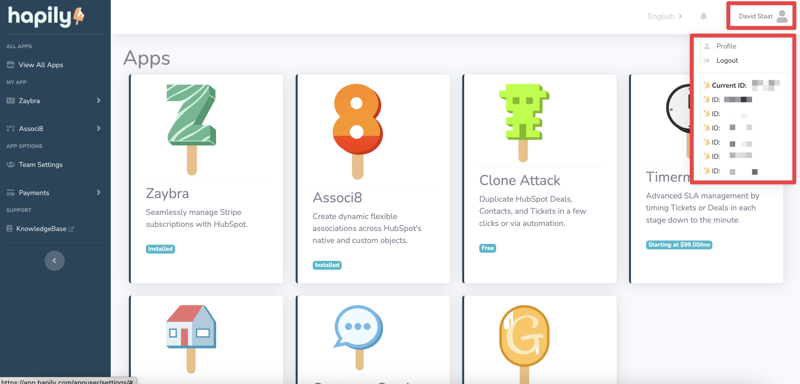
It may take a few seconds to load after you click the HubSpot ID you want to view. Once the page is done loading, you should see all those elusive apps in the left sidebar.
How to add new admins to your hapily portal
Let’s say something needs to be changed in your app settings in your hapily portal but you’re unable to take care of it at the moment. You could just let it sit until you’re able to make the changes. But teamwork makes the dream work! You can have one of your colleagues do the job for you. But you’ll need to grant him/her admin access first.
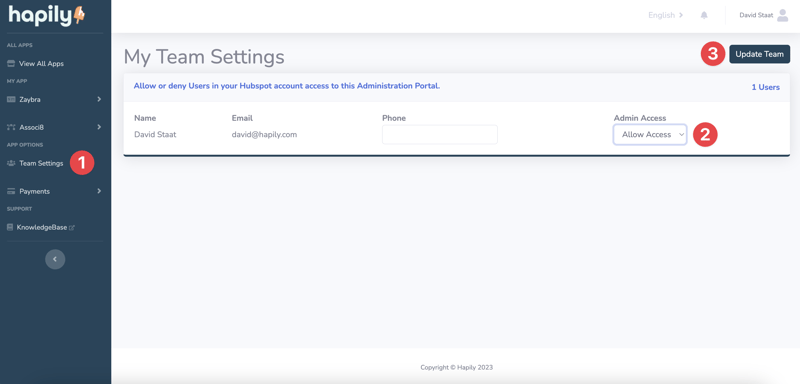
You guessed it. This can be done from within your hapily portal as well. Click Team Settings in the left sidebar. From the Team Settings page you can see all of the users who currently have access to the HubSpot ID you’re viewing.
Under the Admin Access column next to the user’s name, click the dropdown and select Allow Access.
But wait! You’re not done yet. Make sure you click Update Team in the upper right corner of the portal before you leave the page. You may have to scroll back up to the top depending on how many team members you have.
How to upgrade a hapily app subscription
Need a little more bang for your buck? Consider upgrading your subscription! You can do that from the hapily portal as well. All you need to do is:
1. Click Payments > Subscriptions in the left sidebar. This will bring you to the Subscriptions page. From here you can view the Plan, Billing Cycle, and HubSpot Status for each app subscriptions.
2. To change your app subscription plan, hover over the app subscription card and click Change Plan.
3. From here, you can view all the available plans for the app you selected. You can also choose whether to pay monthly or yearly using the slider in the upper right corner of the window. Find a plan you like and click the Get button! This will redirect you to the checkout page.
4. Fill in your payment info and then click Subscribe.
5. The payment method you’re using to pay for that subscription will appear in the plan selection window once it’s been entered. Keep that in mind in case you need to change it later!
6 Side Note: You can click Payments > Billing History in the left hand sidebar to view, well… your billing history!
How to view the hapily Knowledge Base
If you ever need some help using our apps or just want to study up on some of the different use cases, you can click Knowledge Base in the left sidebar.
This will take you to a collection of articles detailing everything you need to know about hapily apps. But don’t worry, I’ll link it here for your convenience.
And that’s all there is to it! It’s not so scary after all. Be sure to share this post with your HubSpot friends. And if you want to learn more about hapily, check out this case study about how we got started.
Isn’t that better?