You love using HubSpot (so do we). But you found yourself needing more features than the native customer portal offered. That’s why you switched (or are thinking about switching) to the Customer Service Portal!
But now that you’ve set everything up on your end, how do you set your customers up on their end?It’s a quick and painless process! All it takes is a simple copy and paste of your custom domain name.
How to find your custom portal domain for the Customer Service Portal
While installing the Customer Service Portal, you’ll be shown your custom domain. But what if you missed it somehow? Or maybe you wrote it down on a note that disappeared into the void (happens to me all the time)? Don’t worry! There’s an easy way to find it.
Where? From within your hapily admin portal of course! That’s where you’ll manage the app’s settings. If you’re not familiar with it, check out this blog post I wrote. Otherwise, you can log in to it here.
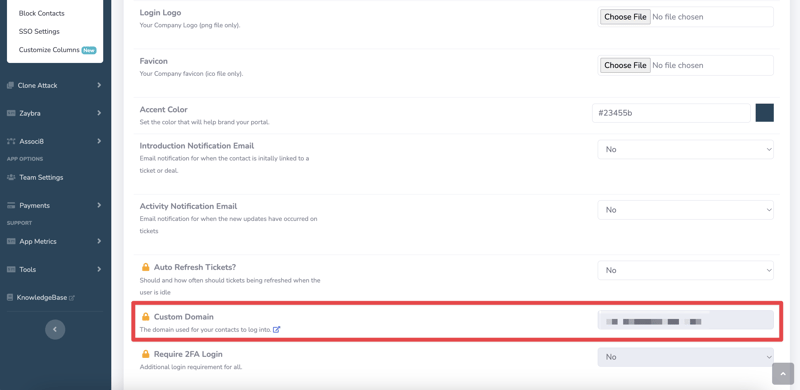
Once you’re logged in, click Customer Service Portal > General Portal Settings in the left sidebar.
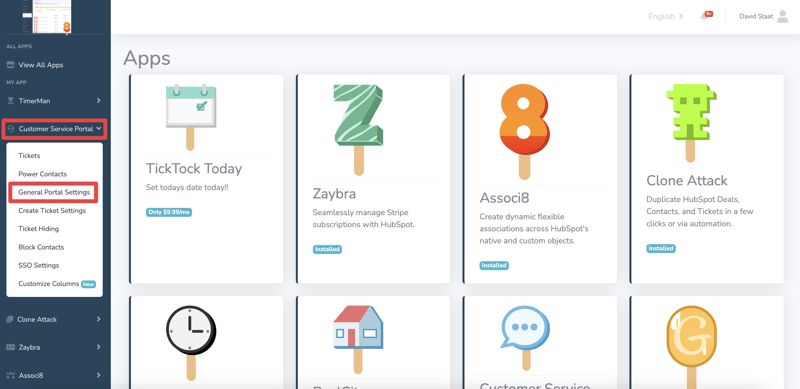
Then scroll down until you see the Custom Domain field. Your domain name will be waiting for you there!
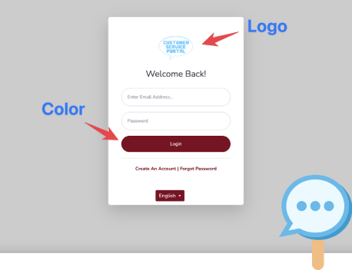
You can send this link to anyone you want to invite to your portal. When a customer uses it, this is what he’ll see:
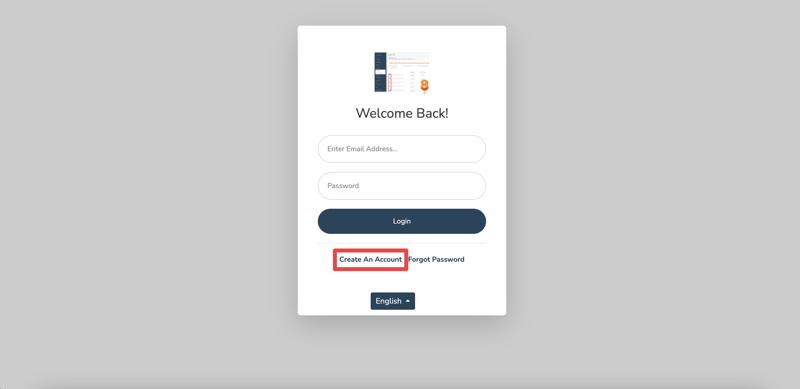
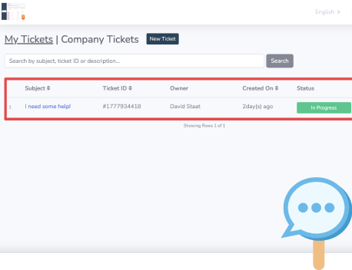
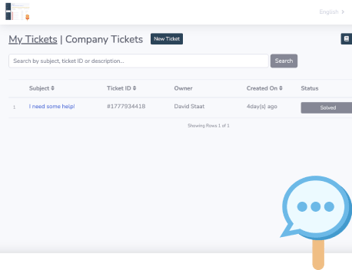
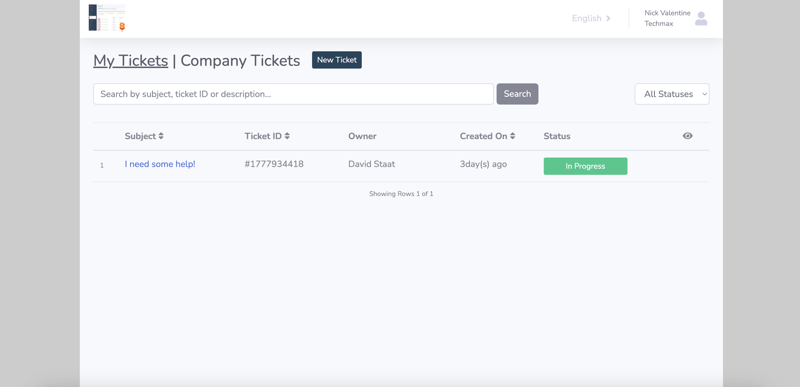
From here, he can create an account for your portal and communicate with your team on his various tickets. Here's an example of what the customer will see once he logs in:
How to change your custom domain in the Customer Service Portal
This will require some collaboration between you and us here at hapily. On your end, you’ll need to perform a DNS record change. This involves creating a CNAME record that points to the custom domain name of your choosing. Instructions for how to do so can be found here.
Once you’re done, email your new domain name to us at care@hapily.com and we’ll handle the rest!
And that’s all there is to it. Now you can invite users to your shiny new portal and prove you’re a customer service master!
If you enjoyed this post, be sure to share it with your friends. And if you want to see what else the app can do, check out this blog post on How to Customize Ticket Columns in the Customer Service Portal!
Isn't that better?