How to Automate HubSpot Object Duplication Using Clone Attack
One of the many things that makes Clone Attack great is how much time it saves you. Instead of manually and painstakingly duplicating HubSpot records, you can do it in just a few clicks!
But what if you need even MORE time saved? What if you’d rather not be involved in the duplication process at all? Don’t worry. Clone Attack has that too! Using the Clone Attack workflow action, you can automate the duplication of records so you can work smarter not harder!
Let’s dive into how it works.
How to duplicate records automatically in HubSpot using Clone Attack
It’s not rocket science! You can do so by selecting the Clone Action in a HubSpot workflow. Just click the + button anywhere on your workflow and click on it from the Choose an Action menu.
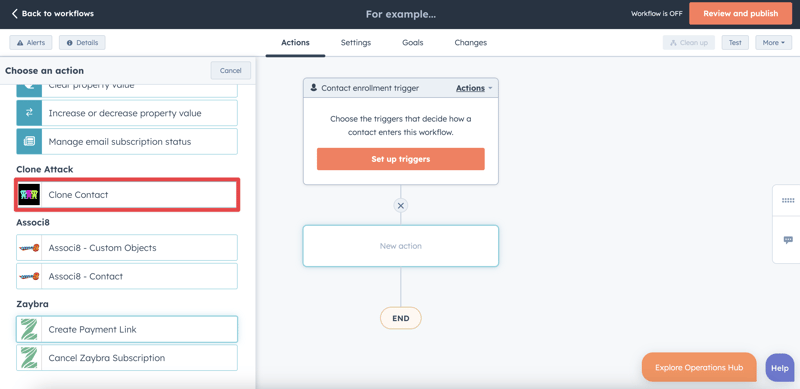
It’s important to note that Clone Attack can’t duplicate Companies. Sad, I know. At the time of this post, HubSpot’s limitations don’t allow for this feature. You can bet we’ll implement it if it becomes possible though!
When you select the Clone Action, you can select which associations / data to carry over. It’s the same as doing a manual duplicate with the app. You’ll only have to do this once though!
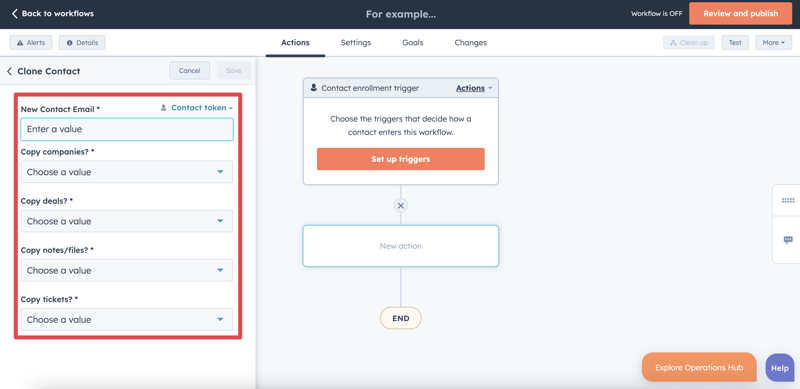
It’s important to note the fields on the Clone Attack workflow action vary depending on the object type that’s being duplicated.
Let’s say for a moment that I own a completely non-fictional baking company. We have a special arrangement with a customer named Nick Valentine where we send him a case of eclairs every week.
It’d be tedious to recreate a deal and add the product to it over and over again since he orders the same thing every time. Let’s use a workflow to sort this out!
1. Start by creating a Deal based workflow.
2. Set the workflow trigger to Deal Stage is any of Closed Won, Baked Good is any of Eclairs (Baked Good is a custom deal property I created for this example) and Deal name is equal to any of Nick Valentine.
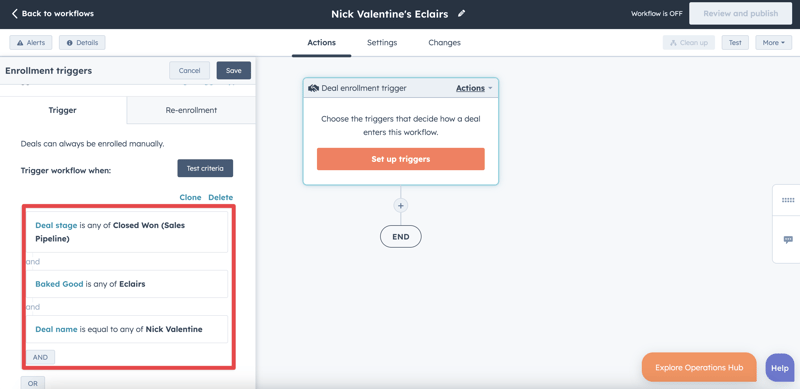
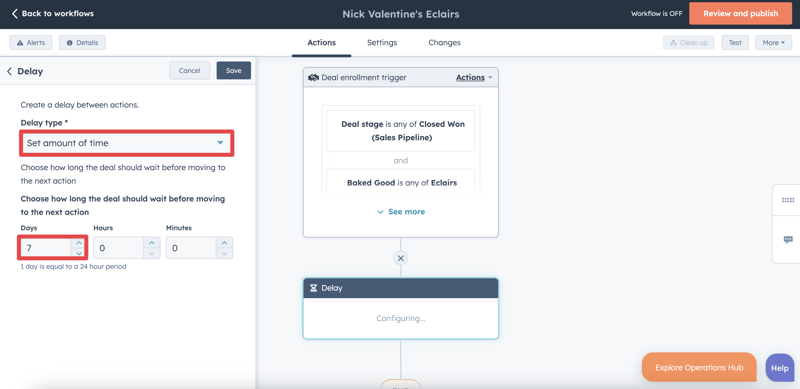
3. Click the + button beneath the workflow trigger and add a Delay action.
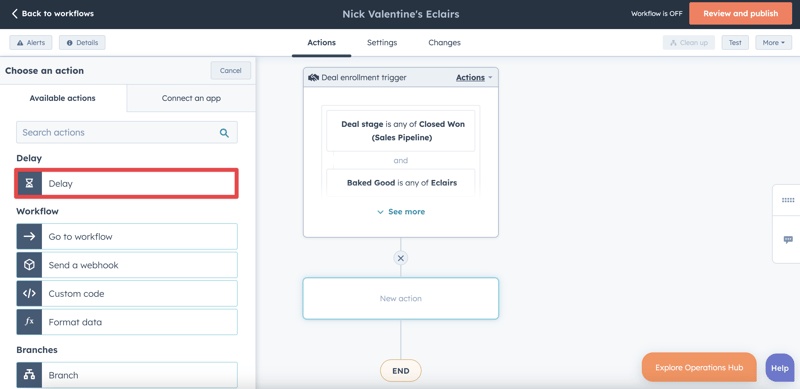
4. For the Delay type, select Set amount of time and set it to seven days.
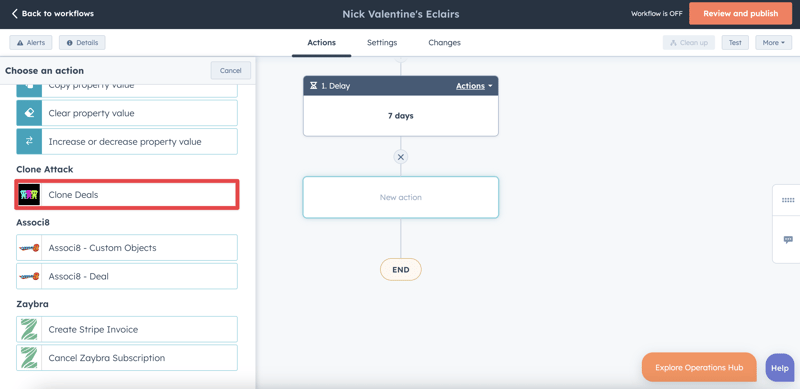
5. Click the + button beneath the delay you just added and select the Clone Deals action.
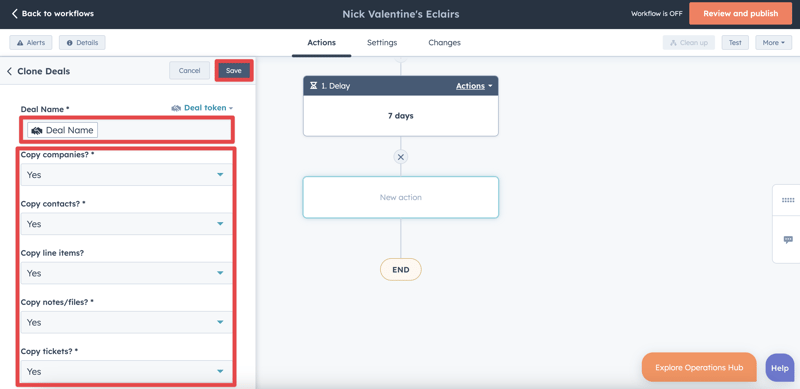
6. For this example, we’ll need the new deal name to match the original deal name. We can just enter in Nick Valentine manually, but we can also use the Deal Name token to do it for us. It won’t make any difference once you’re done setting up though.
7. Choose which associations / data to carry over as well as which pipeline / stage to start the duplicated deal in.
8. Click Save and you’re done!
You might be a little confused as to what I did here. Don’t worry! I’ll explain. Since Nick places a new order of eclairs every week, we set the enrollment trigger to go off whenever one of his deals is completed (When the deal stage is set to Closed won).
As soon as that deal is complete, it enters the workflow where it waits for one week. At the end of the week, a new deal is created based on the previous deal! And when the new deal is completed, the cycle will start anew.
And that’s all there is to it! So get to automating.
If you enjoyed this post, why not share it with your friends? And if you want to see what else the app can do, check out this post on How to Add Labels to Cloned HubSpot Objects Using Clone Attack!


