How to Assign Tickets to Business Profiles Via Workflow
Your company is growing and so is your support team! And like the smart cookie you are, you’re using Timerman to keep track of how long tickets spend in each stage.
But with such a large company, it’s very possible you have team members in separate time zones. Fortunately, Timerman allows you to assign tickets to specific times zones through its business profiles.
But does that process have to be manual? Of course not! That would take way too long. Let’s get a workflow to do the job for us!
NOTE: This example uses the following company properties:
Support Region: A dropdown select property that records a company’s region.
Support Level: A dropdown select property that records the company’s support priority.
ANOTHER NOTE: You will need Timerman - Enterprise to utilize this workflow.
How to create a Timerman business profile
Don’t know how to create business profiles in Timerman? That’s ok. I’ll show you! You can easily set business hours and holidays all within your hapily admin portal. If you’ve installed one of our apps, an account should have already been created for you.
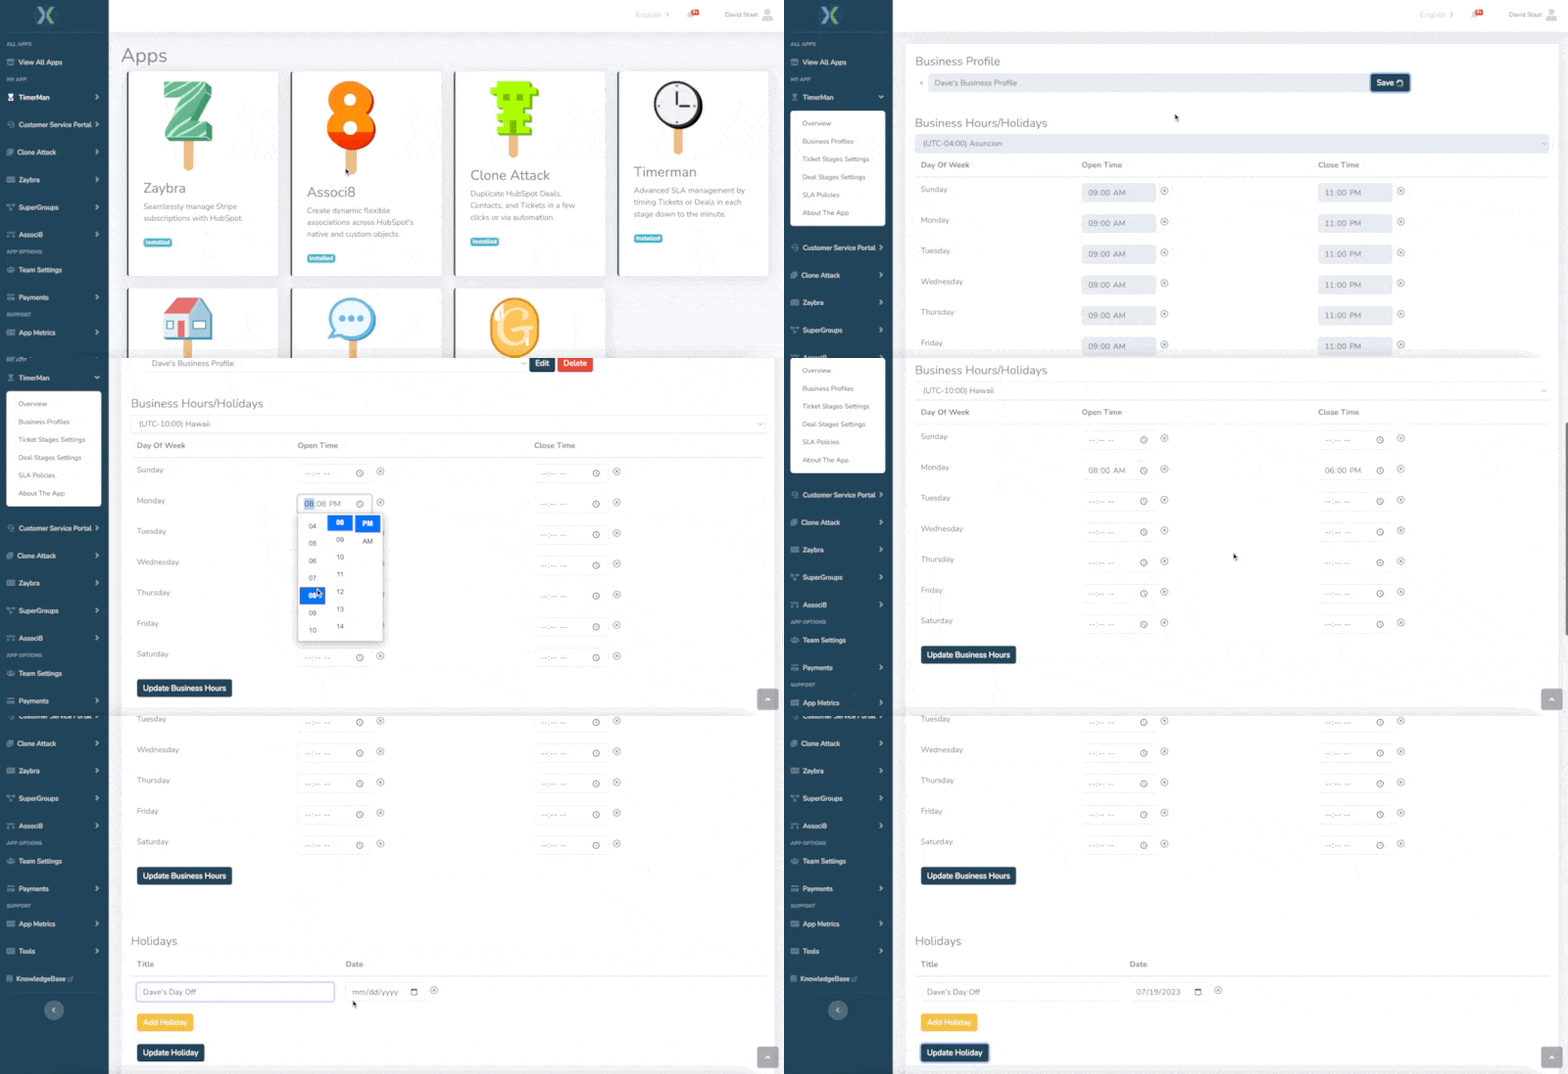
Don’t want to read the steps? Relax. I have a GIF to walk you through it right here:

Otherwise, read on!
1. Log into your hapily portal here.
2. Now that you’re all logged in, you’ll want to click Timerman > Business Profiles in the left sidebar.
3. This will bring you to the Business Profiles page. Give your new profile a name under the Business Profile field. Be sure to click Save. You won’t be able to edit the below fields until you do!
4. Select the time zone you want to use for this business profile.
5. Now you can set the business hours for each day of the week! If a ticket is assigned to this business profile, Timerman will only record ticket times for it during those hours. Be sure to click Update Business Hours when you are done.
6. If you want to add holidays to this business profile, click Add Holiday at the bottom of the page.
7. Give it a name and select the date! Make sure you click Update Holiday when you’re done.
Create as many business profiles as you want. When you’re done, you can move on to creating the workflow.
How to assign tickets to business profiles
Now that you have all of your business profiles created, it’s time to get cracking on assigning tickets to them… by getting a workflow to do it instead!
1. Start by creating a ticket based workflow.
2. Set the enrollment trigger to Create date is known.
3. Now we’ll need to assign the ticket to a business profile based on what support team it’s assigned to. We can use the associated company’s Support Region to assign it to a business profile. You can also create this as a ticket property and have your clients set it on the ticket submission form if it’s easier.
Add an If/then branch.
4. For each branch, check the ticket’s associated company’s Support Region. For this example, I checked if the associated company’s Support Region is any of NAM. Repeat this process in other branches for as many support regions as you need.

5. Hard part’s over! Now to assign the business profile. Under each branch, add a Set property value action under one of your branches.
6. Set the Target Object to Ticket.
7. Under Property to set, select SLA Business Profile.
8. Under SLA Business Profile, select the respective business profile for this branch. Repeat the process for the rest of your branches!
9. If that’s all you wanted to accomplish, you’re done! But perhaps you’d like to set an SLA policy for the ticket as well? Start by adding another If/then branch beneath your Set property value action.
10. This branch will be like the one in step 4. Only we'll use the associated company's Support Level property to decide which SLA policy to assign the ticket to. Create a branch for each Support Level.
11. Add a Set property value action beneath each Support Level branch.
12. Set the Target Object to Ticket.
13. Set the Property to set to SLA Policy.
14. Under SLA Policy, choose the correct policy for each respective branch.
15. But what if you have a TON of support regions? Are you going to have to repeat steps 9-14 on each of their branches? No! Simply add a Go to action at the end of them and select the Support Level if/then branch you just created.

And you’re all done! That was a lot of work, but it’ll save you so much time in the future. Now whenever a ticket is created, it will be assigned to a business profile depending on where its associated company is located.
Thanks for reading! If you enjoyed this post, share it with your friends. And if you want to see what else the app can do, check out this blog post on How to Create Notifications When a Timerman SLA is Missed!


